Test Out Your Creativity With These 6 Sustainable Springtime Crafts
Published March 17 2023, 1:59 p.m. ET

Rain or shine, crafting is always a good way to spend the day. Testing your creative skills can be fun and rewarding — you don’t have to be an esteemed artist to make something awesome!
Thanks to the internet, there’s an endless amount of projects to choose from. To speed up the process, we compiled this list of a few sustainable springtime crafts for you to check out.
Pine Cone Bird Feeder
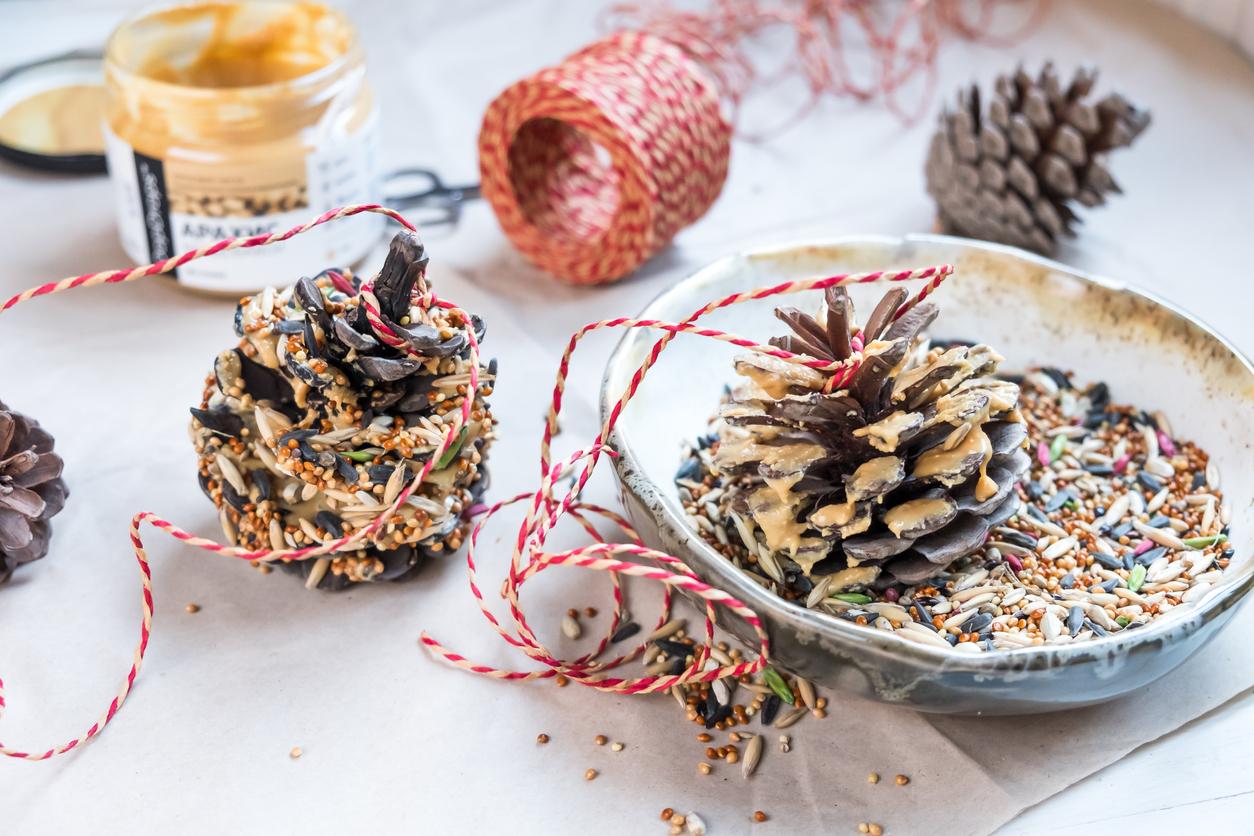
Making your own bird feeder is a classic springtime activity. Not only is it practical, but it can be a fun learning experience for kids too. For this craft, Chronicles of a Momtessorian explained that you’ll only need a few things: Pine cones, peanut butter, birdseed, and string. It doesn’t get any simpler than that!
Spread the peanut butter onto the pinecone and then place it in a bowl or container. Now, cover as much of the pinecone as you can in birdseed — don’t forget the bottom! To finish this project, just tie a string onto the pinecone, hang it outside, and wait for the birds to show up.
Recycled Rainbow Crayons
Chronicles of a Momtessorian gave us another fantastic springtime craft idea: Recycled crayons. This project is awesome for a number of different reasons — it’s super easy, requires only two items, takes a short amount of time, and it’s totally eco-friendly.
If you have kids, you’ll probably already have these two things in your home: broken crayons and a muffin tin. Yup, that’s all you need! Peel the paper off of the broken crayons, add them to a muffin tin and bake them in the oven at 350 degrees Fahrenheit for 10 minutes.
When they’re done, you’re left with some spectacular rainbow crayons! Bonus tip: Use a fun-shaped muffin tin to spice things up a bit!
Flower Petal Suncatcher
If you’re looking for another easy craft, this flower petal suncatcher by Messy Little Monster is perfect. You just need a paper plate, flower petals, and contact paper.
Take your paper plate, cut the center out, and then put the contact paper over the hole. Add your flower petals to the sticky side of the paper and cover them with more contact paper. To hang up your suncatcher, you can create a hole in the top and add a string.
Pressed Flowers And Leaves Bookmark
What bookworm doesn’t want another cool bookmark to add to their collection? Especially one that they made themselves! This pressed flower bookmark is a great project for crafters of all ages, plus, it’s pretty easy.
You’ll need these supplies: Different flowers or leaves, cardstock, scissors, glue, and contact paper. Buggy and Buddy suggested starting the project off with a nature walk to collect your flowers and leaves — this is a fun activity in itself. After the walk, take your findings and press them in a book for three to four days. Patience is key!
Use your scissors to cut your bookmark out of the cardstock and then arrange your pressed flowers however you like. Once you’re satisfied with your design, gently glue the flowers on your bookmark and cover it in clear contact paper. You can use a hole punch and some string to add some finishing touches, but that’s completely optional.
DIY Kaleidoscope
This DIY kaleidoscope craft from Darcy and Brian will have your kids — and let’s be honest, probably you too — totally entertained. You will need a paper towel tube, scrapbook paper, some thin clear plastic, colorful translucent beads, cardboard, aluminum foil, a hot glue gun, scissors, and some markers.
Decorate your scrapbook paper and glue it to the paper towel tube. Trace the ends of the tube three times onto a small piece of scrap plastic and then cut the circles out. Then, hot glue one of the circles to the bottom of the tube, drop the beads in, and add another plastic circle inside.
Next, cut out three long strips of cardboard, add aluminum foil to them, and create a triangle shape. Add the last plastic circle onto the open end, and voila — you’re all done!
Button Bouquet
Aubree Originals button bouquet craft is super fun and unique. For this project, you’ll need a salt and pepper shaker, floral wire, a variety of buttons, a small piece of foam, scrapbook paper, felt, and wire cutters. Many of these things can be found at the dollar store or at a secondhand craft supply store.
To start, select the buttons you want and cut out your felt flowers. Next, attach a wire to each button to form the stems and add the felt in order to create the flowers. Put a piece of scrapbook paper into the shaker, add the small chunk of foam inside, and then insert the wire flowers. For more detailed instructions, check out Aubree Originals video tutorial.
One really neat aspect of the button bouquet is that you can change it according to the season. The fun is just never-ending with this project!