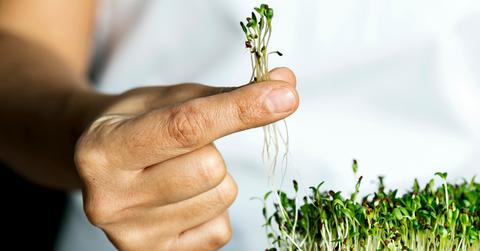
Everything You Need to Know About Growing Microgreens at Home
Welcome to the world of microgreens — miniature plants, herbs, or vegetables that are comparable to sprouts, but unlike sprouts, use soil and sunlight to grow.
Updated March 25 2019, 12:46 p.m. ET

Welcome to the world of microgreens — miniature plants, herbs, or vegetables that are comparable to sprouts, but unlike sprouts, use soil and sunlight to grow. Microgreens can be grown anywhere (even indoors in your kitchen!), which is why they’ve been gaining popularity recently, especially on social media.
Microgreens have amazing health benefits because they are nutrient-concentrated. Because they grow so quickly, they’re also full of healthy enzymes and contain a variety of polyphenols, a type of antioxidant known to reduce risk of heart disease. Nutrient content varies according to each variety of microgreens, but microgreens are generally abundant in copper, magnesium, potassium, iron, zinc, and antioxidants. Microgreens are essentially young vegetable greens; the young plants have concentrated nutrients, which means they typically contain higher levels of vitamins, antioxidants, and minerals than say, more mature vegetables. Science Direct reports that nutrient levels in microgreens can be nine times higher than traditional mature veggies.
Nutrition isn’t the only benefit of microgreens, although it is a significant one. Microgreens are often seen in gourmet dishes at fancy restaurants; that’s because microgreens are incredibly flavorful and bring the added flavor required to elevate a dish. Some microgreens can taste neutral, spicy, somewhat sour, or bitter. And hey, they look pretty, too.
Looking pretty aside, microgreens also have some pretty cool advantages that sprouts don’t have. Bacteria growth in sprouts is generally more common than it is in growing microgreens and that’s because microgreens grow in open air and soil.
Curious as to where to start? There are many different varieties of microgreens, but according to Wellness Mama, some of the most common to grow at home are lettuce, kale, spinach, radish, beet, watercress, herbs, greens, cabbage, mustard, chia, sunflower, and buckwheat. If you’re not sure which varieties of microgreens are right for you, check out this amazing cheat sheet from Bootstrapfarmer that details the preferred media, seeding rate, germination rate, and estimated time to harvest for each microgreen variety.
How long do microgreens take to grow?
One of the most appealing aspects of growing microgreens is the small turnaround time it takes for them to be ready. Of course, the speed of germination does depend on the type of seeds you’ve chosen but generally, microgreens should be ready to harvest in about two to three weeks after they’ve been planted.
How do I harvest microgreens?
Microgreens are typically ready to harvest anywhere from two to three weeks after they’ve been planted. Not sure how you’ll know if they’re ready to be harvested? Once your microgreens sprout their first set of “true leaves,” then it’s time. Your microgreens should be about two inches tall.
Harvesting requires taking a pair of scissors and snipping the greens right above the soil line. It’s that easy. After harvesting, microgreens should be served immediately as that’s when they’ll be the most flavorful. Leftover cut microgreens can be stored in a plastic bag in the refrigerator, but it’s better to eat them sooner rather than later.
Do microgreens regrow after cutting?
While not all types of microgreens regrow after harvesting, many do and actually can be cut several times. Pea shoots tend to regrow after harvesting. To increase your chances of regrowing shoots after they’ve been harvested, make sure to cut them just above the lowest leaf.
You can remove the roots and replant microgreen seeds or even dump the tray and start over again. Microgreens might also be more likely to regrow if they’ve been planted in a larger type of pot like a window box.
How can I serve microgreens?
Microgreens are ready to eat immediately after they’ve been cut or harvested. But be sure to rinse them with filtered water before serving. Bacteria is an unlikely possibility because microgreens grow in an open-air environment and with soil, but it’s better to give a quick rinse before serving than be sorry later.
The possibilities for serving microgreens are endless. They make great additions to salads (combined with more mature leaves) and elevate any dish as a garnish: pasta, meat dishes, burgers, and more.
What do I need to grow microgreens?
Though microgreens might be a staple in fancy restaurants as elegant garnishes, don’t be fooled. Once you have all the tools necessary to grow microgreens at home, they’re really cost-effective. Here’s what you’ll need:
Now, you’ll also need a light source. If you have a sunny, south-facing window available, then that’s the ideal light source. Of course, if your home lacks the sun-time necessary to grow microgreens, investing in a grow light (like this one) might be beneficial. Some growers also line their shallow tray with a warming mat because it speeds up germination, but that’s totally optional and growing microgreens can definitely be done without a mat.
How to grow microgreens at home
Ready to start your microgreen journey at home? Here’s what you’ll need to do: